
This Hairy Bikers Cheese Scones recipe is a light and fluffy bake, which uses mature Cheddar cheese and cayenne pepper for a rich, savory flavor. It’s a straightforward recipe, ready in about 20 minutes.
Jump to RecipeHairy Bikers Cheese Scones Ingredients
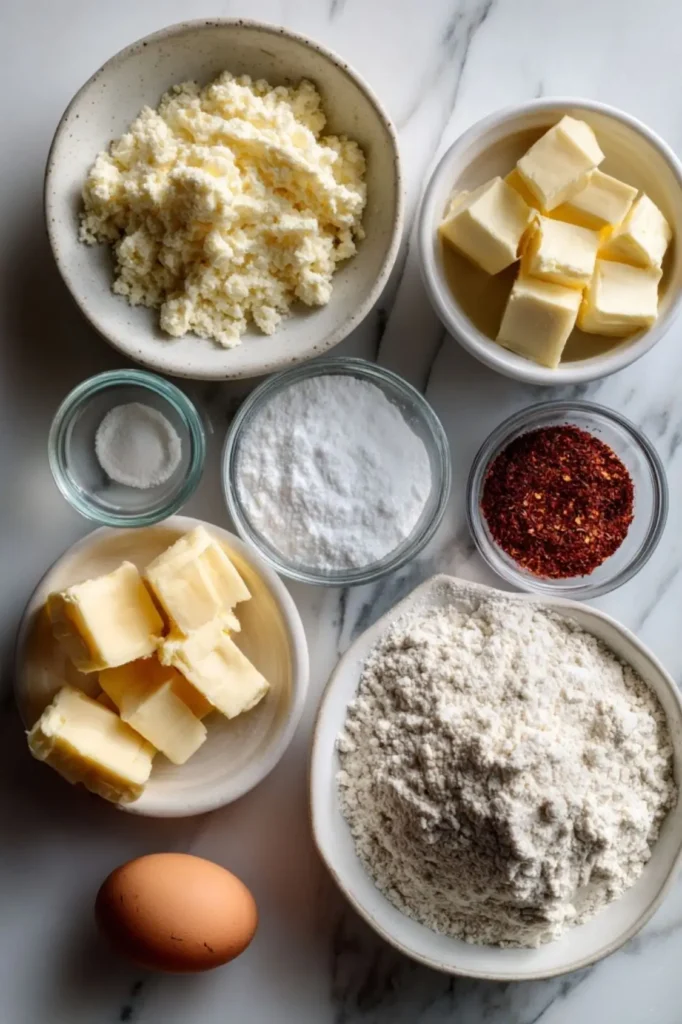
- 225g (8oz) self-raising flour, plus extra for dusting
- ½ tsp baking powder
- A pinch of salt
- 50g (1¾ oz) cold butter, cut into small cubes
- 110g (4oz) mature Cheddar cheese, grated
- ½ tsp cayenne pepper
- 1 medium egg
- 4-5 tbsp milk
How To Make Hairy Bikers Cheese Scones
- Preheat the oven and tray: Preheat your oven to 220°C (425°F / Gas mark 7). Lightly grease a baking tray.
- Mix the dry ingredients: Sift the self-raising flour, baking powder, and salt into a large bowl. Add the cold cubed butter and rub it in with your fingertips until the mixture looks like fine breadcrumbs.
- Add cheese and cayenne: Stir in the grated Cheddar cheese and cayenne pepper until evenly combined.
- Form the dough: Lightly beat the egg in a small bowl. Add it to the flour mixture along with 4 tablespoons of milk. Use a round-bladed knife to mix into a soft dough. Add the final tablespoon of milk if needed. Do not overmix.
- Shape the scones: Turn the dough onto a lightly floured surface. Pat it down to about 2.5cm (1 inch) thick. Use a 6cm round cutter to cut out scones. Gather scraps, gently reshape, and cut more.
- Bake until golden: Place the scones on the baking tray. Brush the tops with milk. Bake for 10–12 minutes until well-risen and golden brown.
- Cool slightly and serve: Transfer to a wire rack and cool for a few minutes. Serve warm for the best texture.

Recipe Tips
- How to get light and fluffy cheese scones: Keep the butter cold and avoid overworking the dough.
- Can I use plain flour instead of self-raising flour? Yes, but add 2 teaspoons of baking powder to help them rise.
- Why are my cheese scones flat? Check that your oven is fully preheated and avoid twisting the cutter when shaping.
- Can I freeze cheese scone dough? Yes, freeze unbaked scones and bake from frozen, adding a couple of extra minutes.
- How to get a golden top on scones: Brush the tops with milk just before baking.
What To Serve With Cheese Scones
These savory scones are perfect warm from the oven and pair well with:
- Salted butter
- Cream cheese
- Tomato chutney
- Crispy bacon
- A bowl of soup

How To Store Cheese Scones
Refrigerate:
Store in an airtight container for up to 2 days. Reheat briefly in the oven to refresh.
Freeze:
Freeze baked scones for up to 2 months. Defrost at room temperature and warm before serving.
Cheese Scones Nutrition Facts
- Calories: 220 kcal
- Protein: 7g
- Carbohydrates: 20g
- Sugar: 1g
- Fat: 12g
- Saturated Fat: 7g
- Fiber: 1g
- Sodium: 300mg
Nutrition information is estimated and may vary based on ingredients and cooking methods used.
FAQs
Can I make cheese scones without cayenne pepper?
Yes, simply leave it out if you prefer a milder flavor.
Can I use a different cheese for cheese scones?
Yes, Red Leicester or Gruyère work well for a different taste.
How do I reheat cheese scones without drying them out?
Warm in a 160°C oven for 5–7 minutes to refresh them.
Can I make cheese scones ahead of time?
Yes, bake them earlier in the day and warm slightly before serving.
Why are my scones tough instead of soft?
Overmixing the dough can make them dense and heavy. Mix just until combined.
Try More Recipes:
- Hairy Bikers Caesar Salad Recipe
- Hairy Bikers Glamorgan Sausage Recipe
- Hairy Bikers Devilled Kidneys Recipe

Hairy Bikers Cheese Scones Recipe
Course: Side DishCuisine: British8-10
servings10
minutes10
minutes220
kcalLight and fluffy cheese scones made with mature Cheddar and a hint of cayenne, perfect served warm.
Ingredients
225g (8oz) self-raising flour, plus extra for dusting
½ tsp baking powder
A pinch of salt
50g (1¾ oz) cold butter, cut into small cubes
110g (4oz) mature Cheddar cheese, grated
½ tsp cayenne pepper
1 medium egg
4-5 tbsp milk
Directions
- Preheat oven to 220°C and grease a baking tray.
- Rub butter into flour, baking powder, and salt until crumb-like.
- Stir in grated Cheddar and cayenne pepper.
- Mix in beaten egg and milk to form a soft dough.
- Pat dough to 2.5cm thick and cut into rounds.
- Brush tops with milk and bake for 10–12 minutes until golden.
- Cool slightly and serve warm.